
Use a signed, room-by-room move-in inspection form with timestamped photos when you get the keys, then repeat the identical form at move-out. That single document, backed by dated photos, is the strongest evidence either party can produce if a deposit dispute lands in small claims. Get a template below, walk every room together, and make sure both signatures go on the page before anyone signs a lease off the back of it.
TL;DR:
- Using an identical signed inspection form with timestamped photos at move-in and move-out provides strong evidence for deposit disputes, especially when signatures and photos are both verified.
- The HUD-style detailed format covers all rooms and fixtures, emphasizing precise descriptions with a standardized condition scale, which prevents vague notes that favor one side in disputes.
- Conducting the walk-through before move-in and move-out, with both parties present and signing on the same form, ensures consistent documentation and reduces opportunities for arguments later.
- Digital platforms that integrate forms, photos, signatures, and timestamps offer superior security and audit trails over paper or separate photo storage, reducing the risk of lost evidence.
- Common mistakes include using mismatched forms or vague language, which can turn disputes into credibility contests, while structured, repeatable inspections help prevent most deposit disagreements.
Table of Contents
- Where to get a move-in inspection form template
- What to document room by room
- How to run the move-in and move-out walkthrough
- Why signed forms and photos win deposit disputes
- Customising your form and moving to digital workflows
- What most landlords and tenants get wrong
- Give your rental inspections a paper trail that actually holds up
- Sources
- FAQ
Where to get a move-in inspection form template
You don’t need to build a checklist from scratch. Several reliable sources publish free, editable templates, and the right one depends on how much detail you actually need to capture.
The HUD occupancy handbook’s Appendix 5 sets the benchmark. It is federal guidance built for subsidised housing programs, but the room-by-room format works for any rental in any state, and it treats a documented move-in and move-out inspection as standard business practice, not an optional extra. The accompanying HUD sample form lists condition items for fixtures, floors, walls and appliances, and ends with a signed declaration that the unit was inspected and found in decent, safe, and sanitary condition. That declaration wording is worth copying verbatim onto your own template.
For something faster, university and state agency PDFs strip the process down to a printable page. Salisbury University’s tenant checklist is a good example: one page, fillable, no legal jargon, designed so a student tenant can complete it in the time it takes to walk the unit once. It won’t hold up as well in a contested dispute as a detailed inventory, but it beats no documentation at all.
If you want something closer to an industry standard, state realtor association forms strike a middle ground. The North Carolina Association of REALTORS property assessment form includes structured item lists, signature blocks for both parties, and a disclaimer that the form doesn’t replace legal advice, a detail worth keeping on your own version too.
Pick your starting point based on the handover:
- Quick handover, low-value unit: the one-page university or state style checklist gets signatures on file in minutes.
- Detailed inventory, higher-value property or long lease: the HUD-style appendix format, expanded room by room.
- You need legal defensibility built in: a realtor association template with a disclaimer clause and formal signature blocks.
Whatever you choose, check your state’s landlord-tenant statute for any mandatory addendum, some states require specific disclosures (lead paint, mould history, prior bed bug treatment) attached to the inspection record itself. Add those as extra pages rather than cramming them into existing fields.
What to document room by room
Vague notes lose disputes. “Small mark on wall” tells an arbitrator nothing; “6 cm scuff, north wall, near door handle” tells them exactly what existed on day one and where to look in the photo. HUD’s sample form structures this by breaking the unit into rooms and listing fixtures within each one, and that structure is worth copying directly onto your own form.
Work through the unit in this order:
- Living areas. Walls, ceiling, flooring or carpet condition, windows and screens, blinds or curtains, light fixtures, power points, and any built-in shelving.
- Kitchen. Benchtops, cabinet doors and hinges, sink and tapware, stovetop and oven condition, exhaust fan, fridge (if supplied), and floor condition around high-wear zones like the sink and stove.
- Bathroom. Tile grout condition, shower screen or curtain, tapware, toilet, exhaust fan, mirror, and any visible mould or water staining.
- Bedrooms. Wardrobe doors and tracks, flooring, walls, windows, and light fittings.
- Exterior and shared areas. Entry door and lock, letterbox, any yard or balcony space, exterior lighting, and shared stairwells if applicable.
- Utility and safety items. Smoke alarm presence and test date, water heater, HVAC filter condition, circuit breaker labelling, and any supplied fire extinguisher.
For each item, use a consistent condition scale rather than free-text opinions. Guides across the industry converge on the same five-point code: Excellent, Good, Fair, Poor, Missing, and that consistency is what lets you compare the move-in and move-out forms side by side without arguing over what “fine” meant eight months ago.
When something is broken, missing, or non-functional at move-in, mark it clearly on the form and note it again in a “pre-existing damage” section if your template has one. A dishwasher that doesn’t drain properly isn’t the tenant’s fault at move-out if it was noted as faulty on day one, but only if that note exists in writing with both signatures attached.
Pro Tip: Reference the photo filename directly on the form next to the written note, e.g. “IMG_0234, hallway scuff.” When a dispute happens months later, nobody remembers which photo goes with which line item unless you tied them together at the time.
How to run the move-in and move-out walkthrough
The process only works if both parties do it the same way, twice. Here’s the sequence that avoids most of the arguments landlords and tenants end up having later.
- Schedule it before handover. Confirm a specific date and time with the tenant before keys change hands, not after. Both parties need to be present for the walkthrough to count as agreed documentation rather than a one-sided report.
- Inspect before the tenant moves belongings in. An empty unit is far easier to photograph and assess than one full of moving boxes. If that’s not possible, note it on the form.
- Use the identical form at move-out. This is where most landlords cut corners, and it’s the single biggest mistake to avoid. If move-in used a five-point condition scale for the kitchen benchtop, move-out needs to score that same benchtop on that same scale, on the same line of the same document.
- Photograph every area, not just problem spots. Empty rooms, clean carpet, and undamaged walls are also evidence, they prove the baseline condition you’re both agreeing to. Resident Inspect’s walkthrough guidance recommends photographing every room regardless of condition, precisely because a dispute six months later hinges on what wasn’t damaged as much as what was.
- Sign, date, and exchange copies on the spot. Both parties sign the same page, the date goes next to each signature, and each person walks away with a copy, physical or digital, that day. Don’t let the form sit in someone’s inbox unsigned.
- If one party won’t sign, send a dated copy anyway. Registered mail or a timestamped email with read receipt creates a paper trail even without a countersignature. It’s weaker evidence than a mutual signature, but it beats no record at all.
The walkthrough itself rarely takes more than 20 to 30 minutes for a standard one or two-bedroom unit. The time cost is trivial next to what a contested deposit dispute costs in small claims filing fees, missed work, and strained relationships.
Why signed forms and photos win deposit disputes
A signed move-in inspection form with dated photos is consistently cited as the strongest evidence in a security deposit dispute, and the reasoning is straightforward: a form with two signatures and a photo timestamp is far harder to argue with than a memory of what the carpet looked like fourteen months ago. DepositHawk’s evidence guidance recommends walking each room with the tenant present and comparing the identical move-in form against move-out condition, line by line, rather than starting a fresh assessment from scratch.
Security deposit return timelines vary significantly by state, some require return within 14 days, others allow up to 45, so check your specific state’s landlord-tenant statute before assuming a national standard applies.
Keep both the physical form and a digital backup. A single paper copy in a filing cabinet is one water leak away from being useless as evidence.
The condition code system earns its keep here. Using Excellent, Good, Fair, Poor, Missing consistently across both inspections means a “Fair” rating at move-in that’s still “Fair” at move-out proves nothing changed, no argument needed.
Knowing what counts as damage versus normal wear saves both sides a lot of grief:
- Normal wear and tear: faded paint from sunlight, worn carpet paths in high-traffic areas, minor nail holes from picture hanging, loose door hinges from years of use.
- Chargeable damage: large stains or burns in carpet, holes in walls beyond small nail marks, broken fixtures, pet damage to doors or flooring, and missing items that were present at move-in.
If a landlord refuses to sign the form, or a tenant disputes a move-out charge after the fact, the party holding the better paper trail almost always wins. Small claims courts weigh dated, signed documentation heavily over verbal recollection, so if you’re heading toward a dispute, gather every photo, every signed copy, and any written correspondence about the unit’s condition before you file.
Customising your form and moving to digital workflows
Standard templates cover the basics, but most rentals have at least one detail that needs its own line item. Add fields for:
- Pet-related conditions if pets are permitted, note existing scratches, stains, or odour at move-in so you’re not disputing origin later.
- Key and access device counts how many keys, fobs, or garage remotes were handed over, and how many come back.
- Utility responsibility which utilities the tenant activates versus what’s included, especially relevant for share houses.
- Pending repairs anything the landlord has already agreed to fix, with a target date, so it doesn’t get mistaken for tenant-caused damage later.
Paper forms work, but they come with real limitations: photos live separately from the document, originals get lost, and there’s no audit trail proving when a signature was actually added. Fillable PDFs solve the loss problem but still leave photo evidence disconnected from the written notes.
An online, form-native workflow closes that gap. When the inspection form, the photos, and the signatures all live in the same digital record with a timestamp attached, there’s no ambiguity later about when something was documented or who signed what. A digital tool can generate that kind of workflow automatically once the form is filled in, turning a walkthrough straight into a stored, dated record.
Pro Tip: If you’re managing more than one rental, build your customised fields once and reuse the same digital template every time. Consistency across units is what makes year-over-year comparisons useful if a tenant disputes charges on a unit you haven’t inspected in eighteen months.
What most landlords and tenants get wrong
The mistake I see repeated most often isn’t a missing signature, it’s a mismatched form. A landlord uses a detailed inventory at move-in, then dashes off a two-line summary at move-out because they’re in a hurry to re-let the unit. Without an identical basis for comparison, neither party can prove anything conclusively, and the dispute turns into a credibility contest instead of a documentation review.
The second mistake is vague language. “Carpet a bit worn” means nothing to a small claims judge. “6 cm scuff, north wall, near door handle” tied to a specific photo filename means everything. This isn’t about writing more, it’s about writing precisely, and it costs no extra time once it’s habit.
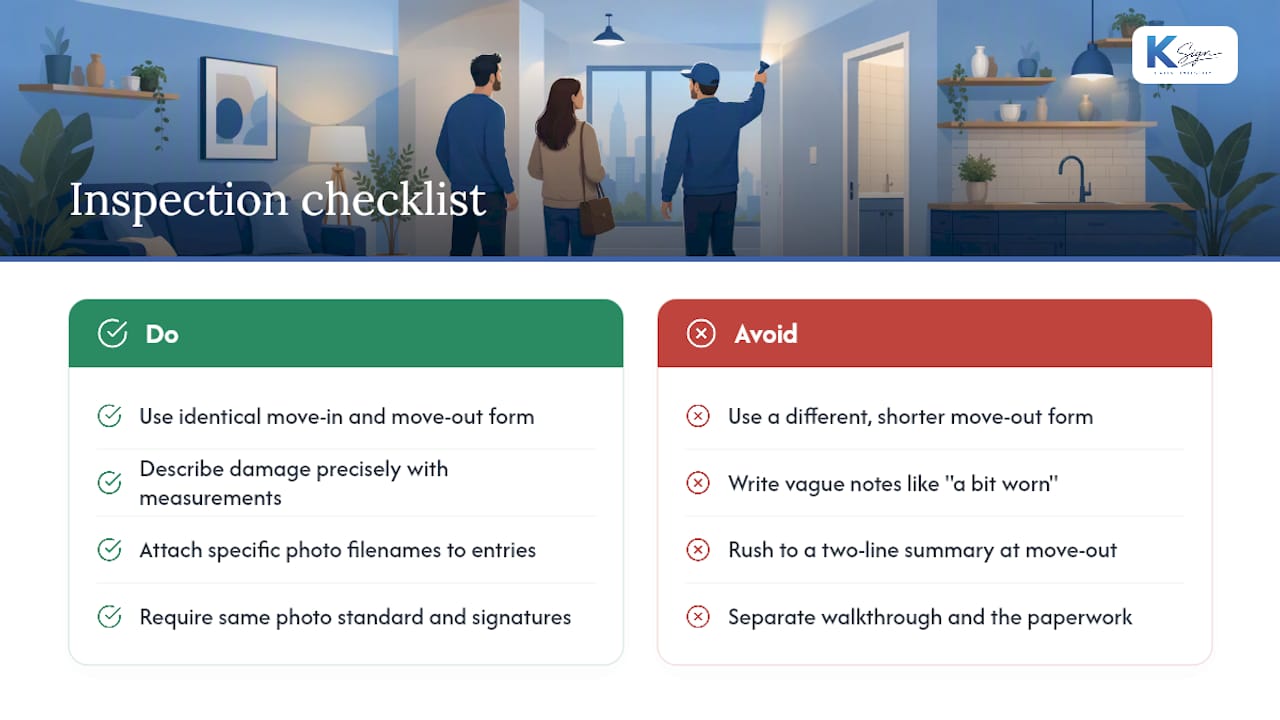
Landlords using a structured, repeatable process, same form, same photo standard, same signature requirement, avoid the vast majority of the deposit arguments that end up costing both sides money and goodwill. That discipline matters more than which specific template you download.
A form-to-contract workflow reflects this directly: guided inspection forms generate a signed, timestamped record automatically, with mobile-first templates built so the walkthrough and the paperwork happen in the same visit, not two.
— Josh
Give your rental inspections a paper trail that actually holds up
Landlords juggling paper checklists, phone photos, and a separate e-signature app end up with evidence scattered across three places when a dispute hits, exactly the situation a documented, signed form is supposed to prevent. A digital platform can close that gap by turning your inspection form into one workflow: fill in the guided checklist, attach photos, collect both signatures electronically, and the whole record, timestamps and audit trail included, is stored automatically.

For property managers handling deposits alongside inspections, Ksign’s payment collection tools let you tie deposit refunds or charges directly to the signed condition report, so the money and the paperwork never get separated. The document generation feature also means your inspection form can feed straight into a lease renewal or condition addendum without retyping a thing.
If you’re managing more than a handful of units, it’s worth seeing what a proper workflow costs against the hours lost chasing paper forms. Check the Standard and Professional plans and get your first digital inspection form built today.
Sources
For anyone wanting the primary references behind the templates and figures in this guide:
- HUD occupancy handbook appendix 5: Move-In/Move-Out inspection format
- Free Move-In / Move-Out Inspection Form — DepositHawk
- Move-In / Move-Out Inspection Checklist — Resident Inspect
FAQ
What Is a Move-In Inspection Form Used For?
It documents the exact condition of a rental unit, room by room, before a tenant moves in, so both parties have a signed reference point to compare against move-out condition later.
Do Both the Landlord and Tenant Need to Sign It?
Yes. A form signed by only one party carries far less weight in a dispute; HUD’s own sample form includes a signed declaration from both sides confirming the unit’s condition.
Is the Same Form Used at Move-Out?
Ideally yes, the identical form and condition scale should be used at move-out so each item can be compared line by line against its move-in rating.
How Long Do Security Deposit Timelines Take?
Security deposit timelines vary by state, so check your state’s landlord-tenant statute for specific requirements.
Can Digital Tools Replace a Paper Inspection Form?
Yes. Platforms like Ksign let you complete the checklist, attach photos, and collect e-signatures in one workflow, creating a timestamped audit trail that’s harder to dispute than a paper form stored separately from its photos.